What is a normal map, and why is it purple?
A normal map fakes bumps without adding polygons. How its colours encode direction, OpenGL versus DirectX, normal versus bump, and how to make one.
29 September 2026 · 5 min read
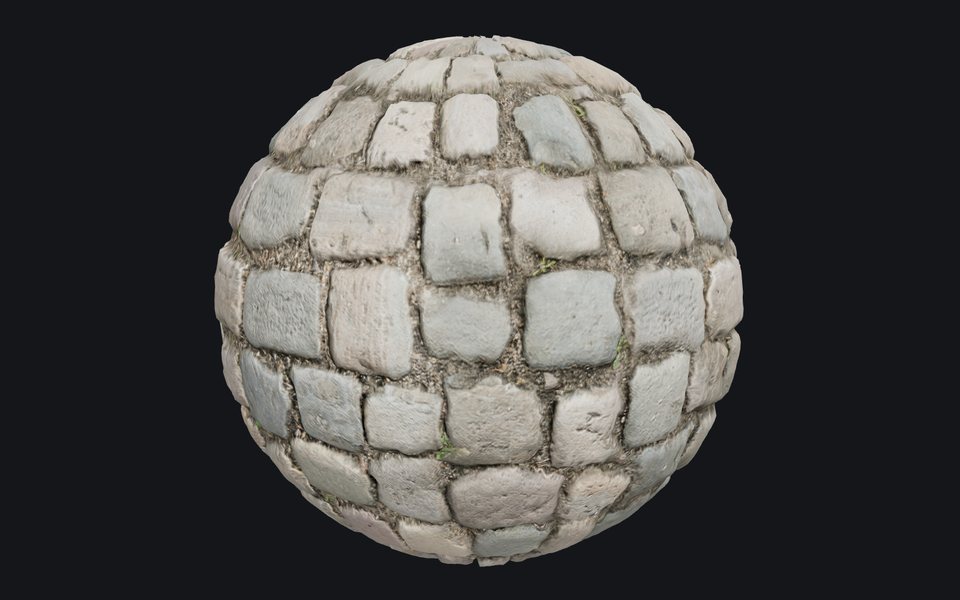
A normal map is a texture that tells the renderer which way every point of a surface faces. It lets a flat or smooth surface catch the light as if it had bumps, grooves and scratches, without a single extra polygon. The sphere above is perfectly smooth; every stone and every joint on it comes from the normal map below, read from a photo.
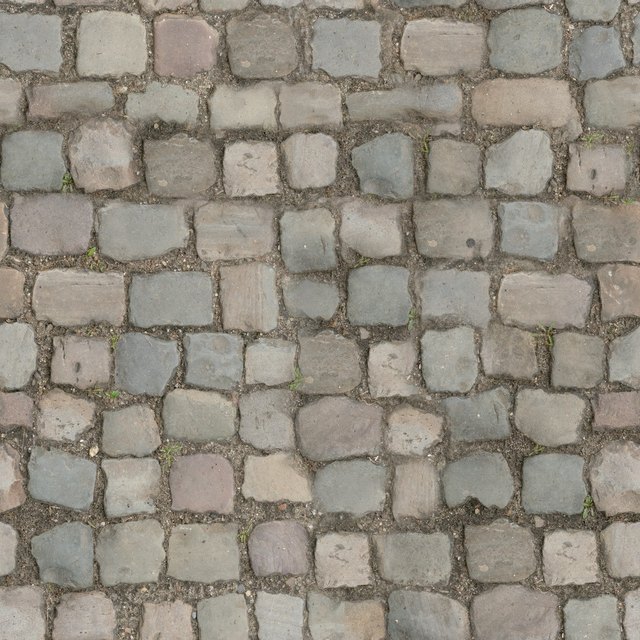
The photo
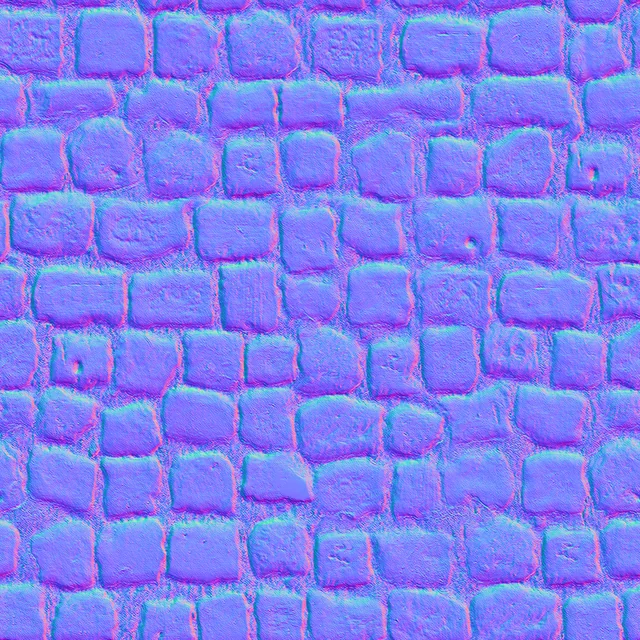
Its normal map
What "normal" means
In 3D, a surface's normal is the direction it faces: an arrow standing straight out of it. The renderer uses normals for all of its lighting. A face whose normal points at the light is bright; one that points away is dark. A model only has normals where it has vertices, so a flat wall made of two triangles has one direction everywhere and lights as one flat plane.
A normal map replaces that one direction with a different one for every pixel of the texture. The wall is still two triangles, but where the map says "this bit tilts left", the renderer lights that bit as if it tilted left. Mortar lines darken on one side and catch the light on the other, and the eye reads depth.
Why it is purple
Each pixel stores a direction as three numbers, and a texture has three colour channels, so the direction is written as a colour:
- Red is how far the surface tilts left or right.
- Green is how far it tilts up or down.
- Blue is how much it faces straight out.
Each channel runs from −1 to 1, stored as 0 to 255, so "no tilt" is the middle value, 128. A pixel facing straight out is red 128, green 128, blue 255: the lavender blue that fills every normal map. Slopes shift it towards pink, green or cyan, which is why the edges of every stone in the map above are tinted and their flat tops are not.
This is a tangent-space normal map: the directions are relative to the surface, so the same map works wherever the texture is applied, on a wall, a floor or a sphere. Its cousin, the object-space normal map, stores absolute directions and is rainbow-coloured; it only works on the one model it was made for, and you will rarely meet one outside a baking tool.
OpenGL and DirectX
There are two conventions for which way is "up" in the green channel. OpenGL says green means up; DirectX says green means down. Nothing else differs, and a map in the wrong one looks subtly inside out: bumps become dents, lit from below.
| OpenGL (green up) | DirectX (green down) |
|---|---|
| Blender, Godot, Unity, three.js, glTF, Maya | Unreal, 3ds Max, Substance's DirectX export |
The fix is to flip the green channel: a checkbox in Unreal's texture settings, or DirectX normals when you make the map in Image to normal map.
Normal, bump, height and displacement
These all describe the same bumps, and they are easy to mix up:
- A height map (also called a bump map) is greyscale: white is high, black is low. It stores distance, not direction.
- A normal map stores the slope of that height at every pixel. Renderers light with slopes, so a normal map gives sharper, more reliable shading than a bump map, which the renderer must turn into slopes on the fly.
- Displacement uses a height map to actually move the geometry. It changes the silhouette, which a normal map never can: look at a normal-mapped wall edge-on and it is perfectly flat. Displacement costs polygons, so most surfaces use a normal map and keep displacement for close-ups.
What is PBR shows all of these next to each other for one brick material.
Where normal maps come from
Baked from a detailed model. The classic game workflow: sculpt a model with millions of polygons, make a light version, and bake the difference into a normal map. The light model then looks almost like the heavy one. Remesh does exactly this: it builds a clean mesh of a few thousand faces and bakes the original's detail onto it, which is how the gnome below keeps the strands of its beard.
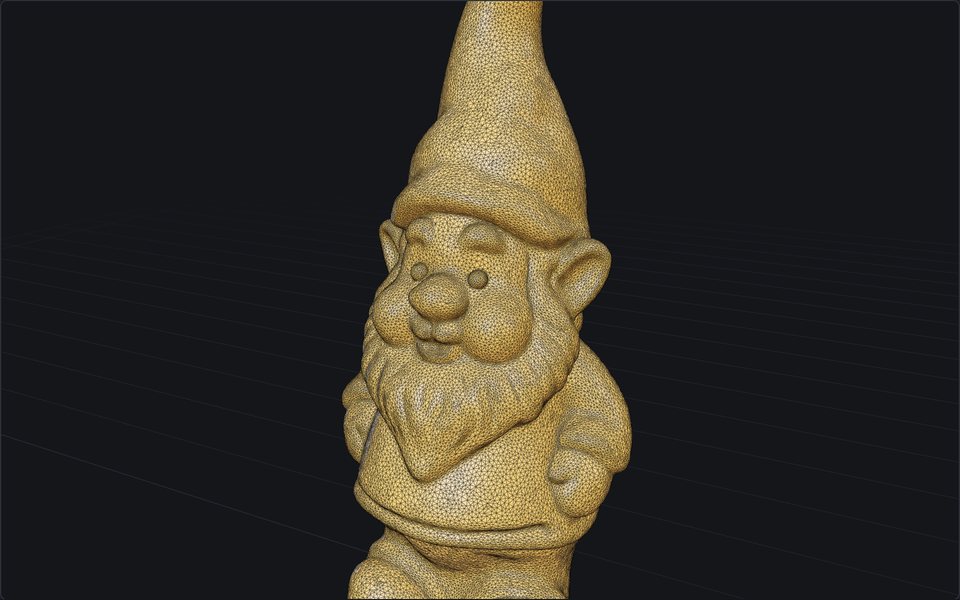
Hundreds of thousands of triangles
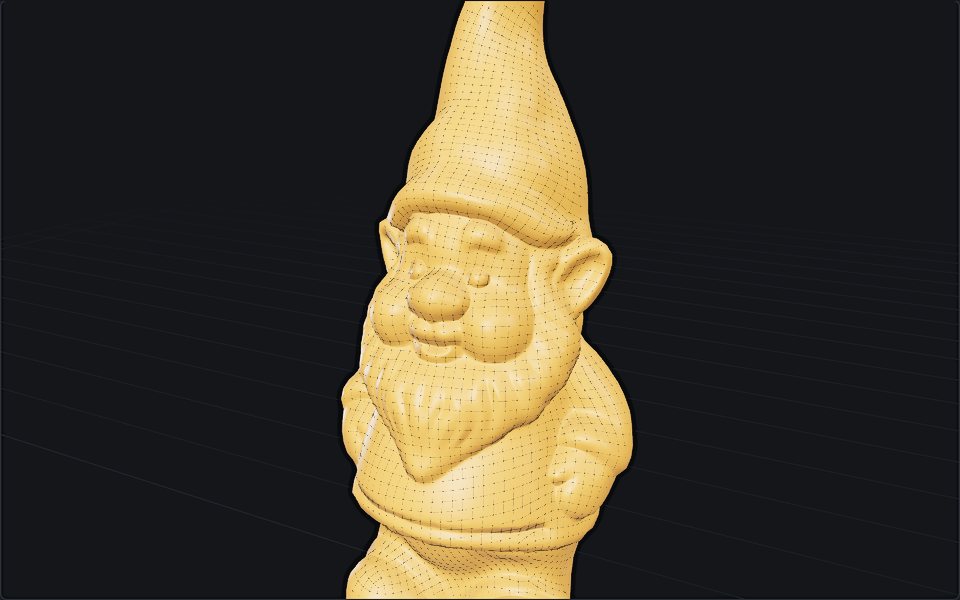
5,628 quads and a normal map
Made from a photo. For a surface such as a wall, a floor or fabric, the normal map can be worked out from a picture of it. The quick way reads brightness as height, which works on stone and plaster and fails on anything painted, where a white line becomes a ridge. Models trained on real materials read the shape instead. Image to normal map does that on our GPU in about ten seconds. The step-by-step is in how to make a normal map from a photo.
Generated with a material. The texture generator makes a tiling colour from a description and reads its normal, height, roughness and metallic maps together, so they agree with each other.
Using one
- Blender: Image Texture node, colour space set to Non-Color, into a Normal Map node, into the Normal input of the Principled BSDF. Leaving it as sRGB is the most common mistake; the bumps come out weak and skewed.
- Unity: set the texture's type to Normal map in the import settings, then assign it to the material's Normal Map slot.
- Unreal: usually detected on import. Tick Flip Green Channel if it came in as OpenGL.
- three.js:
MeshStandardMaterial({ normalMap }); for a DirectX map, setnormalScaleto(1, -1).
When it looks wrong
- Bumps look like dents in some lights: the wrong convention. Flip green.
- Weak, washed-out bumps in Blender: the texture is not set to Non-Color.
- Visible seams on a model: the map was made for different UVs, or the mesh has hard edges the bake did not know about.
- Everything looks like crumpled foil: the strength is too high. Turn it down in the material, or make the map again with less strength.
More from the blog
29 September 2026 · 4 min
What is retopology, and when automatic is enough
Retopology rebuilds a messy mesh as clean, even quads. Why models need it, manual versus automatic, the tools in Blender and beyond, and where they fail.
24 September 2026 · 4 min
How image to 3D works, and why the back is a guess
One photo in, a textured mesh out in about half a minute. What happens in between, what the model cannot know, and the photo that gives it a chance.
23 September 2026 · 4 min
Best AI 3D model generators in 2026, compared
Meshy, Tripo, Rodin, Hunyuan3D, TRELLIS.2 and Stable Fast 3D compared by input, output, price and licence, so you can pick the right one for your job.