How to fix an STL file that will not slice
Holes, flipped faces, loose fragments, overlapping parts: choose how far the repair goes, watch it run, and see every patch it made before you download.
23 September 2026 · updated 29 September 2026 · 3 min read
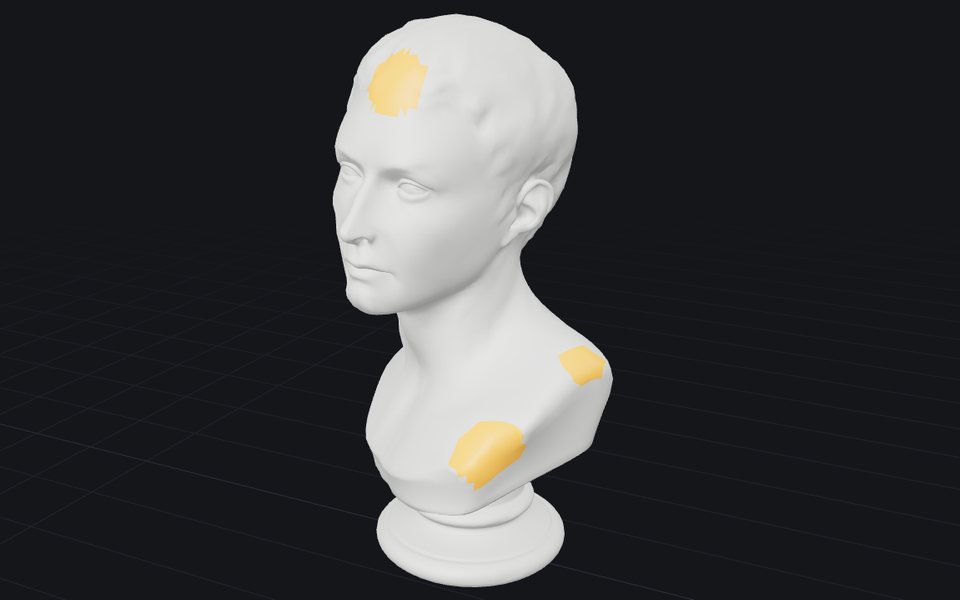
The slicer says the model has errors, or it slices with strange gaps in the layers, or a piece is missing in the preview. Here is the two-minute version of fixing that. The repair runs in your browser; the file stays on your machine.
Drop the file in
Open Repair and drop the file: STL, OBJ, PLY, GLB or glTF, up to 100 MB. No file to hand? Try a broken model loads a torus knot with holes cut out, faces flipped and a stray shard, so you can see what a repair does.
Choose how far it goes
The Settings box has four choices. The defaults suit almost every file, and the tool remembers what you pick.
- Close holes: the widest hole to patch, as a share of the model's size. Up to ½ closes the missing bottom of a bust; Up to ¼ is more careful; Any closes everything; Off leaves them open.
- Loose pieces: Remove small drops pieces under 2% of the biggest one's size, the shards scans and booleans leave behind. Keep all keeps a deliberate small part, a button or a jewel. Main only keeps just the largest.
- Make solid: When needed seals the model into one piece only when patching alone cannot make it printable. Always does it every time; Never only patches.
- Solid detail: Standard and Fine run in your browser. Best still joins exactly in your browser where it can; where it cannot, our server rebuilds the model on a finer grid with its textures baked on, in about a minute.
Press Repair
The steps tick off as they run: merging duplicate vertices, removing zero-area triangles, fixing face directions, checking for loose pieces, closing holes, measuring, and making it solid if needed. A large scan takes a few seconds.
The verdict is one line. Sealed, ready for the slicer is the one you want. Under it, a sentence lists every edit: vertices merged, faces turned, pieces removed, holes closed, and whether the parts were joined exactly or rebuilt.
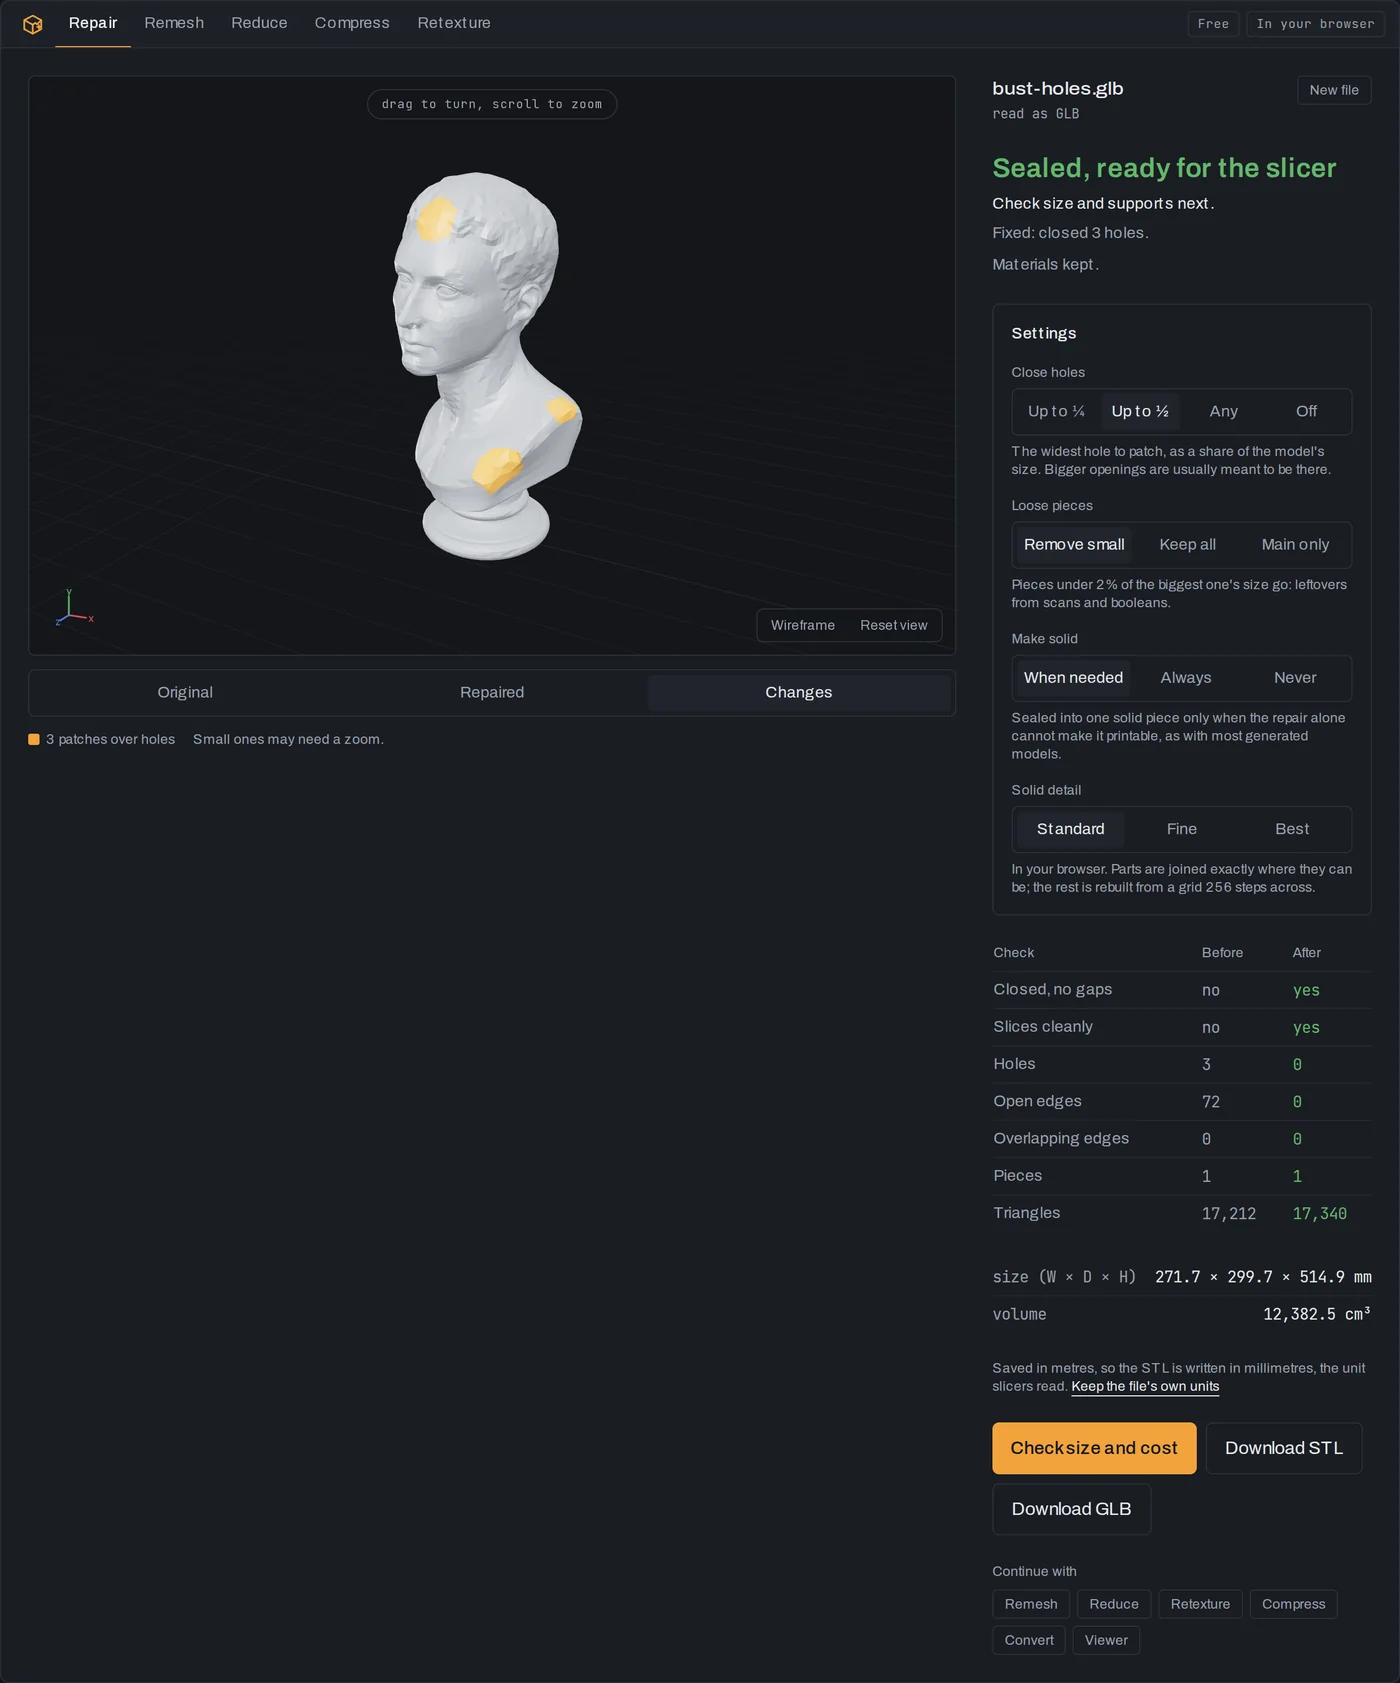
A scanned marble bust with three holes torn out, repaired on the default settings and shown on the Changes view: three patches, the model sealed, its materials kept. Look at the Changes
The switch under the model has three views: Original, Repaired and Changes. Changes paints every patch amber and every removed piece red, so you can see exactly what the tool added and took away. Small ones may need a zoom.
A patch is not a flat lid. Each hole is triangulated, refined to the density around it and then smoothed to continue the curvature of its rim, so a hole in a head comes back as a dome. Look at the large ones anyway: if a patch covers something that should have had shape, a nose or a handle, the missing part needs modelling, not repair.
Download
Download STL for the slicer, or the file's own format for a modeller. A GLB or glTF keeps its materials, UVs and textures through the repair, and patches blend into the texture around them. A file saved in metres is written in millimetres, so it opens at the right size in the slicer; Keep the file's own units turns that off.
Then Check size and cost opens it in Print cost: the filament weight, the price, the printers it fits and whether any walls are too thin.
When the parts overlap
Patching fixes the skin. It does not fix a model made of parts that were never joined: a figure whose arm passes through its body, or a generated model that is three shells pushed into each other. Every shell is closed, yet the slicer still sees walls inside the object. That is what Make solid is for.
It first joins the parts exactly, the way a boolean union does in Blender, so no detail is lost and the colours stay where they were. When the geometry is too tangled for an exact join, it fills the model into a fine grid of cells, wraps one sealed skin around everything the outside can reach, and moves that skin back onto the original surface. That always slices. The cost is detail finer than a grid cell and slightly rounded sharp edges, which Fine or Best mostly win back. After a rebuild, See the repair without the solid shows what patching alone would have given you.
For the vocabulary in the table (open edges, overlapping edges, pieces), see watertight, manifold, non-manifold.
More tutorials
24 September 2026 · 3 min
Image to 3D print: how to 3D print a picture
Turn a picture of an object into a sealed STL at the size you want, and know the filament cost and the printer it fits before you slice.
22 September 2026 · 2 min
How to make a normal map from a photo
Turn a photo of a surface into normal, height, roughness and occlusion maps, read by AI on our GPU in seconds.
21 September 2026 · 4 min
Decimate in Blender, or reduce polygons online
Cut a heavy mesh down with Blender's Decimate modifier or in your browser: which mode to use, how far to go, and how to keep the shape and the textures.