In this tutorial you will learn how to create realistic mirror material in 3ds Max, using several different techniques. The tutorial is aimed at the beginner, but it might be interesting for more advanced users others as well. As usual, there are several different ways to do something in 3ds Max and achieve similar results. In this tutorial we'll cover 3 different techniques to create a mirror that reflects other objects in the scene.
Note: Click on the image in each step for a larger screenshot.
Option 1. Flat Mirror Material
Step 1
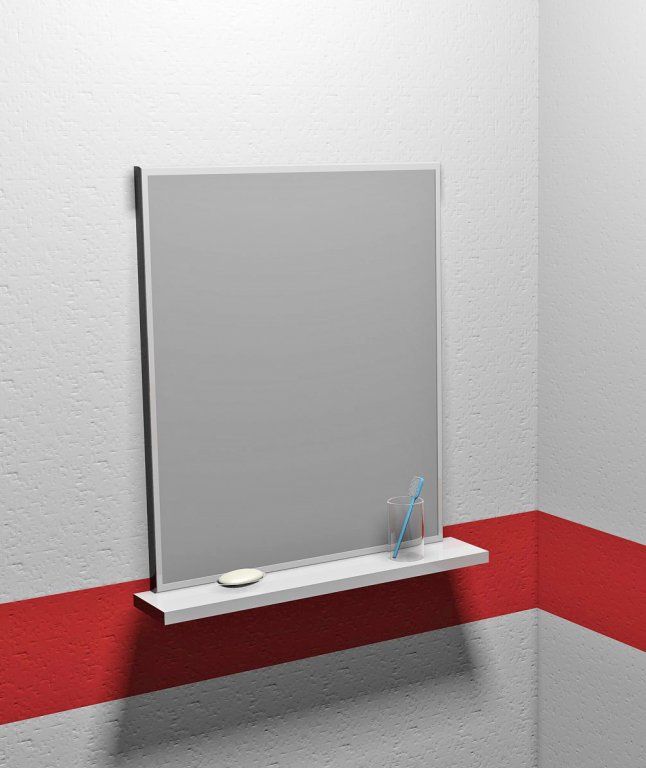
First we need scene that contains a mirror object and one or more mirrored objects. You can download the scene used in this tutorial here, or use your own scene and objects. For this first mirror option, we're going to assign the mirror material to the object MirrorPlane, which as the name implies is simply a Plane.
Step 2
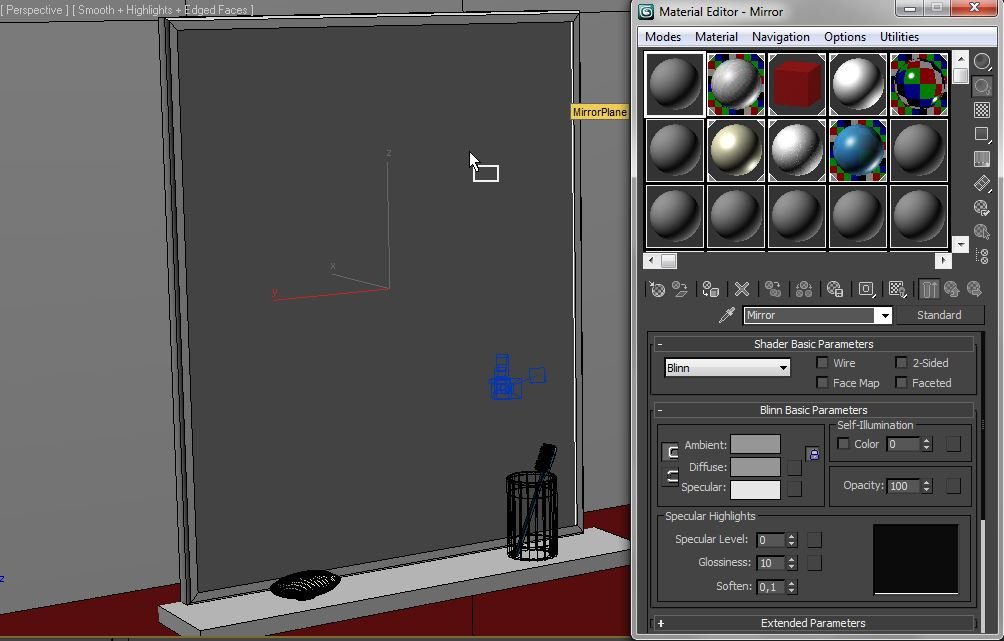
Press the M key to open the Material Editor (or select Material Editor from the Rendering menu) and rename the first material to Mirror.
Drag the material to the MirrorPlane object in the scene to assign it.
Step 3
Click the map button (the small blank square) next to the Diffuse color of the material. From the Material/Map Browser that opens, select Flat Mirror material.

Step 4
If you used the sample scene, press C to change to the Camera's view, and then render the scene (press F9). The objects in front of the mirror should now appear reflected in the mirror. If you're using your own scene, make sure there is actually an object in the reflected view of the mirror. Also make sure there are one or more a lights in the scene that also properly lit the back of the mirrored object. If some objects appear black in the mirror, try adjusting the near and far attenuation settings of the light

Step 5
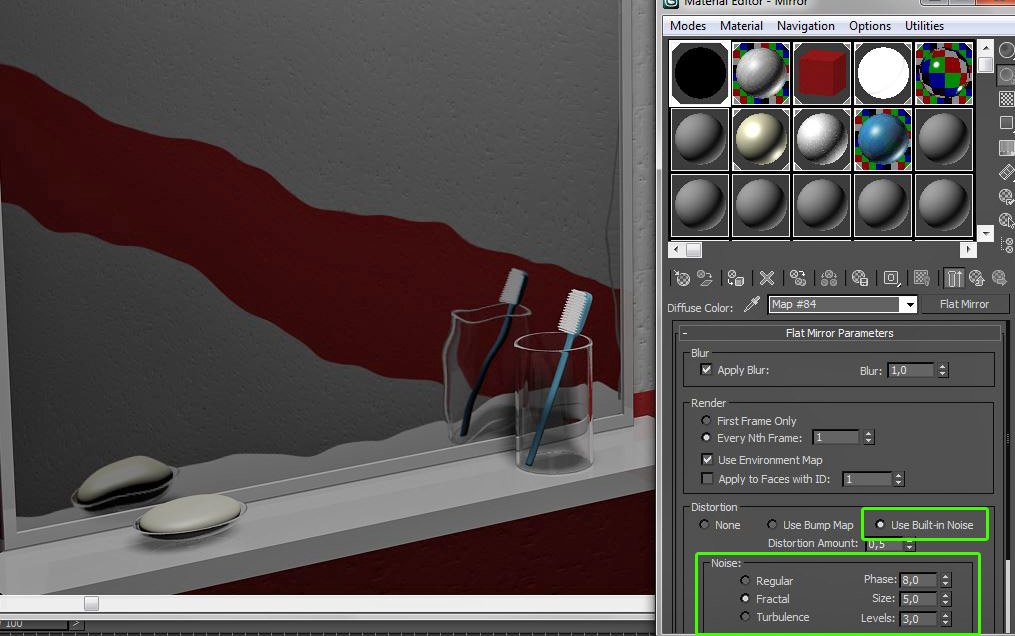
The Flat Mirror material provides a few options to change the appearance of the reflected image. By default, the Blur setting is enabled and set to 1.0. You can lower this value for a more crisp reflection, or increase it to blur the reflection more noticably.
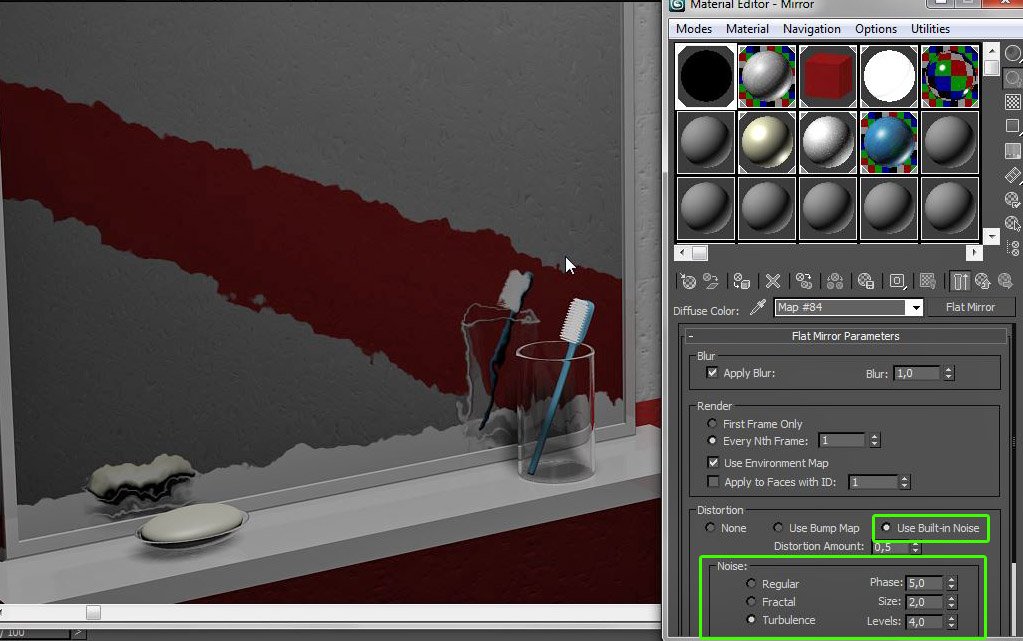
The Distortion Built-in Noise parameters allow you to distort the reflected image, which can work well with for example for a piece of mirror foil that isn't entirely flat (even though the mirror object still has to be flat, specifically its faces need to be coplanar).
Fractal, Phase 8.0, Size 5.0, Levels 3.0:
Turbulence, Phase 5.0, Size 2.0, Levels 4.0:
Option 2. Highly Reflective Raytrace Material
Unlike the Flat Mirror material option, this 2nd option using highly reflective Raytrace material, works for both flat surfaces and other more complex models. It is more resource intensive, but it's less finicky than the Flat Mirror material when it comes to lighting and reflection other reflective surfaces.
Step 1
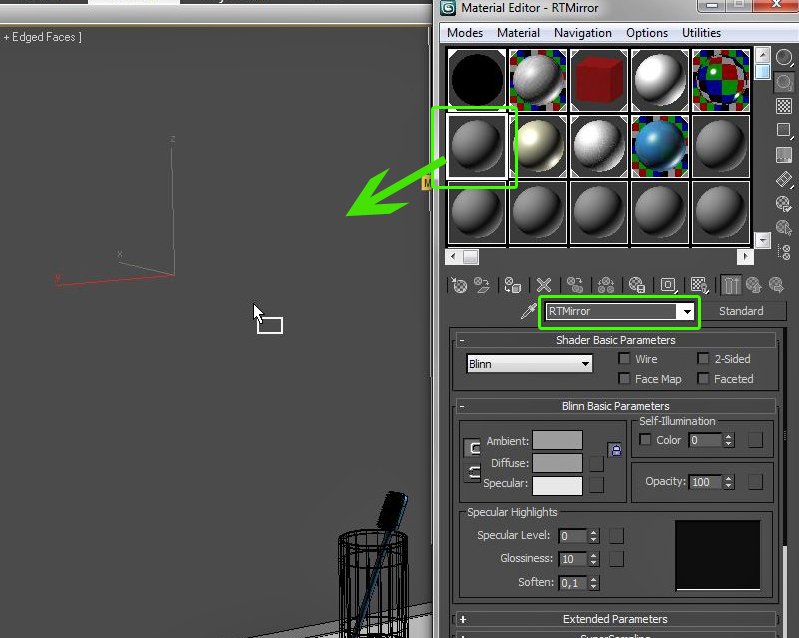
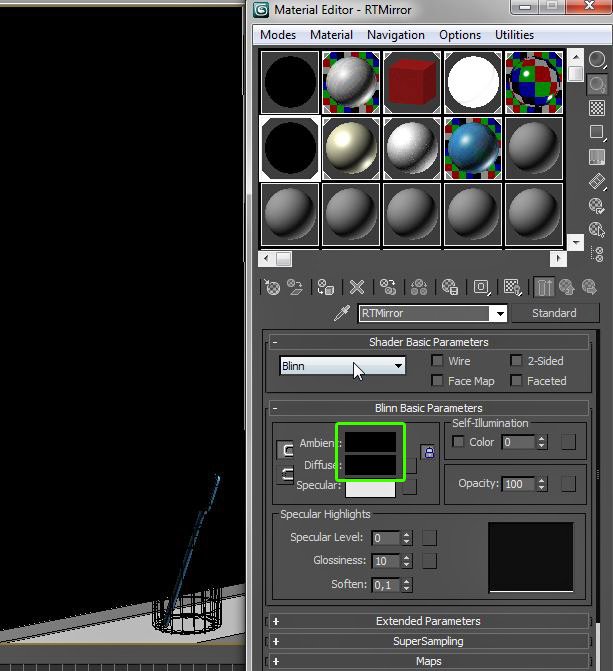
Select an empty slot in the Material Editor and name it RTmirror. Drag the material to the MirrorPlane object in the scene to assign it.
Step 2
Click the Diffuse color and change it to black (changing the Ambient color to black as well).
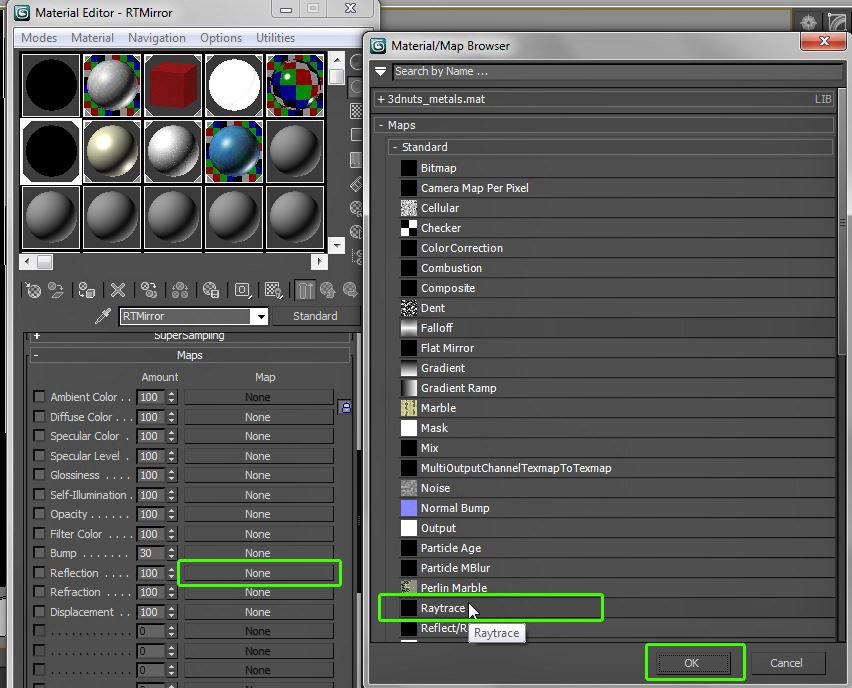
Step 3
Open the Map section, tap the Reflection slot, and choose Raytrace from the Material/Map Browser that opens.
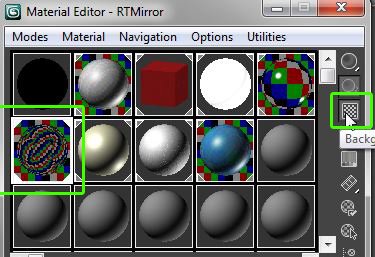
If you click on the Background button in the Material Editor, you can immediately see the material is now reflecting the colored checkered background entirely.
Step 4
Press F9 to render the scene again. As you can see, the reflection is of higher quality compared to the Flat Mirror material, properly reflecting the light in the glass for example.
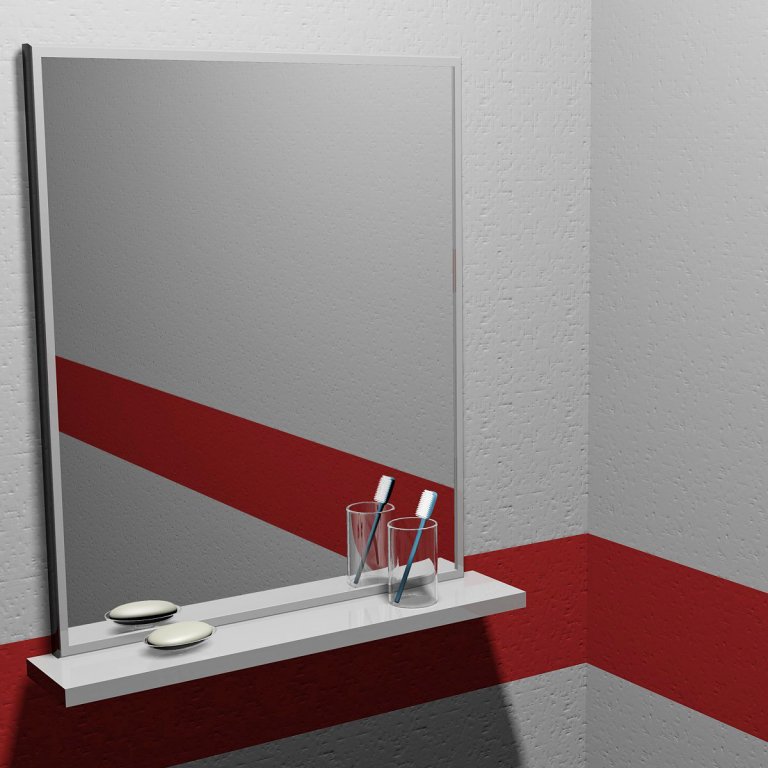
Another benefit of using a Raytrace material as Reflection is the ability to reflect the reflection of another mirror, something the Flat Mirror material cannot do. If you are working with mirrors facing each other, it may be wise to limit the number of times a reflection bounces, to reduce render time of this already more resource intensive option. This mirror material also works well for chrome objects.
Option 3. Mental Ray Mirror Material
Mental Ray has its own mirror material you can use to quickly create a mirror.
Step 1 To use it, first change the Renderer to Mental Ray.
Step 2 Press M to open the Material Editor, select an unused slot, and rename it to MRmirror. Assign the material to the MirrorPlane object in the scene.
Step 3 Tap the button labeled "Standard"from the Material/Map Browser that opens. Select AutodeskMirror from the Mental Ray section and press the Ok button.
Step 4 The only setting provided is the Tint color. Press F9 to render the scene, and the mirror should reflect the scene again.
This concluded our mirror material tutorial, happy mirroring!