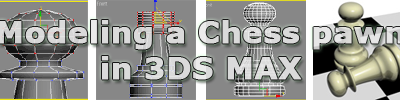
In this tutorial you will learn how to model a chess pawn in 3ds Max. The main purpose is to show you some basic Editable Poly edit options and how they can be used to create something very quickly. This tutorial is suitable for absolute beginners.
Note: Click on the thumbnail in each step for a larger screen shot that includes the viewports and the relevant portion of the user interface.
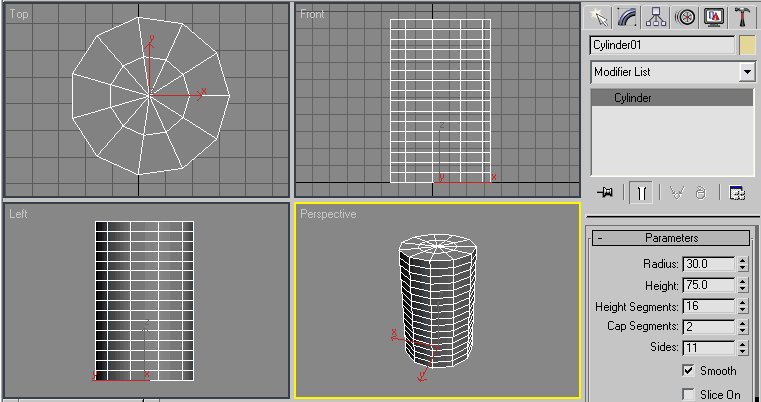
Step 1 Create a Cylinder on the Top viewport with the following attributes. Radius: 30 Height: 75 Height Segments: 16 Cap Segments: 2 Sides: 11 Smooth: Enabled
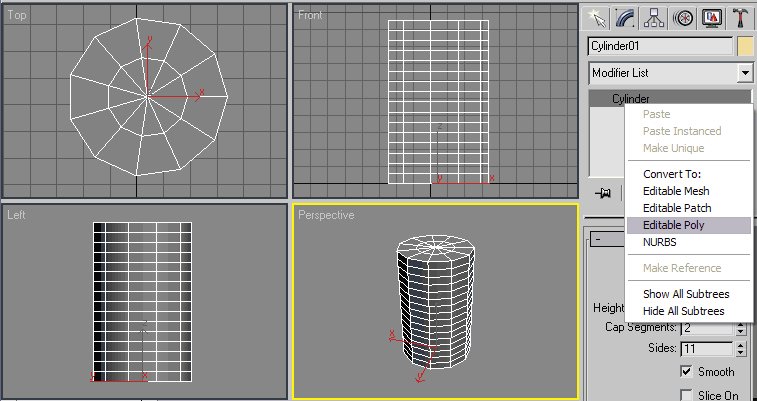
Step 2 Convert the cylinder to an editable poly by right-clicking Cylinder on the Modify tab and selecting Editable Poly below Convert To:.
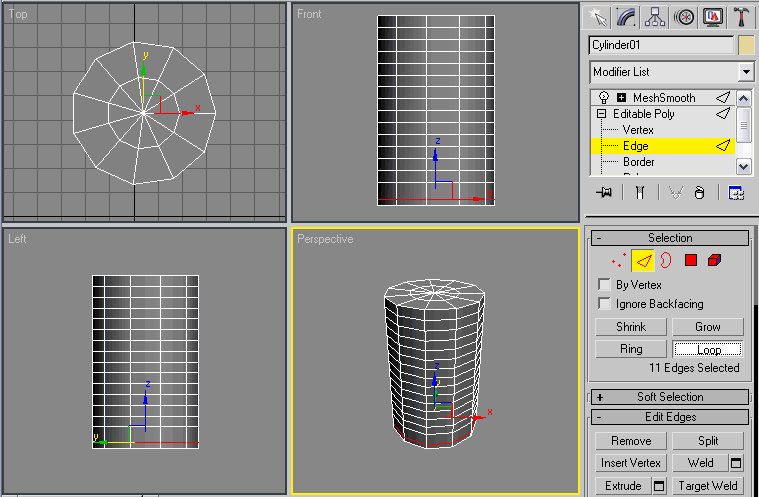
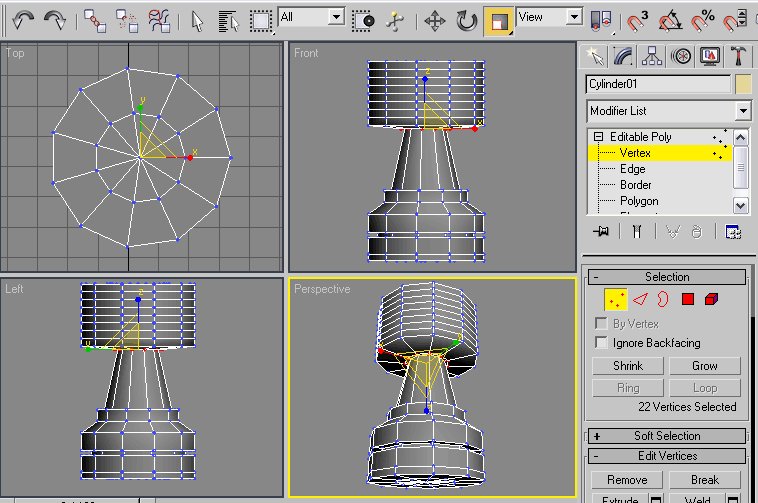
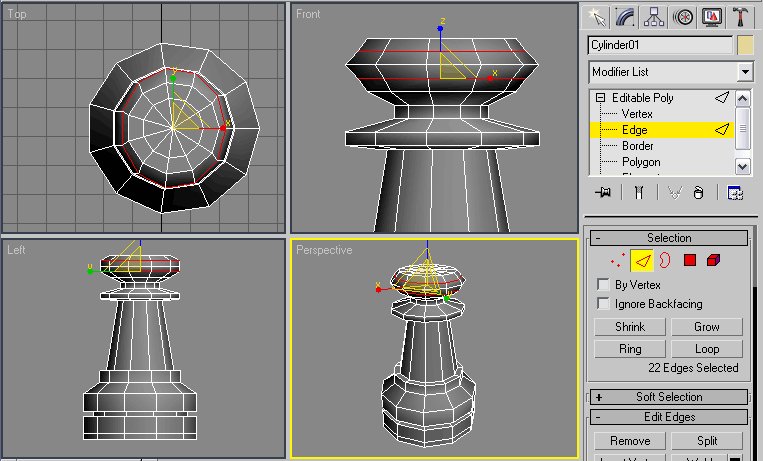
Step 3 On the Front viewport, select the second row of edges from below and move it down until it almost meets the bottom. You can select the entire row by going to the Edges sublevel of the Editable Poly, selecting one edge on the row, and clicking the Loop button. Instead of moving the edges down, you can also select the vertexes (by drawing a selection rectangle around them) and move those down.
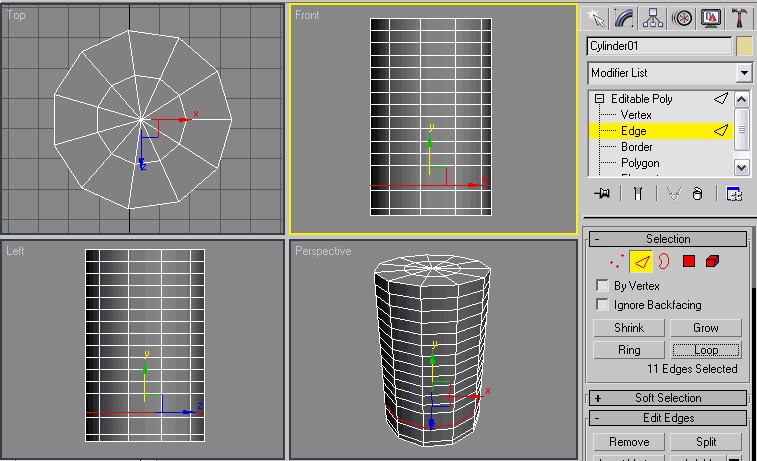
Step 4 Select the third row from below and move it down until it looks like the image on the right (click it for more details).
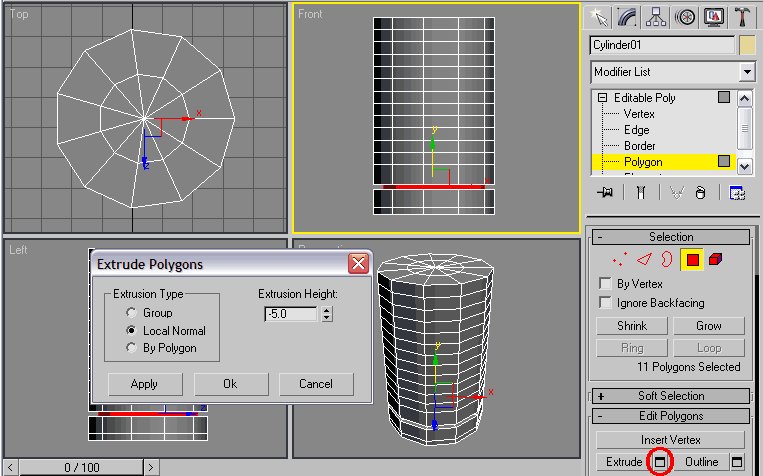
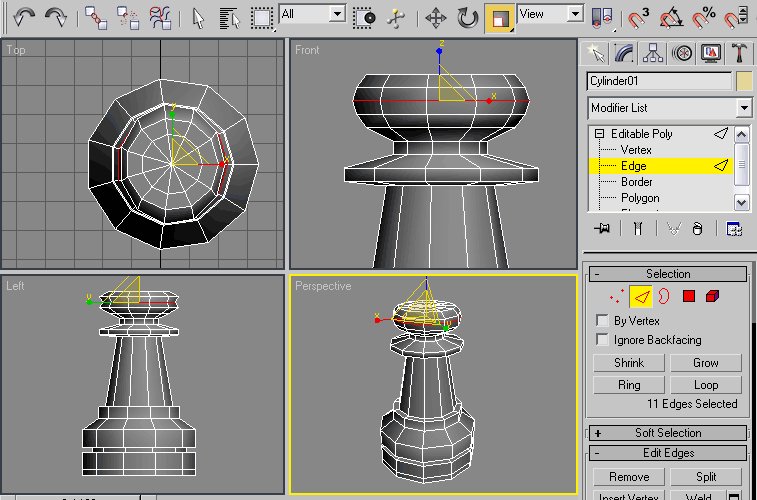
Step 5 Go to Polygon sublevel and select the third row of polygons from below. Click the square button next to the Extrude button, select Local Normal, and set Extrusion Height to -5.0 (minus 5). Click OK to extrude the polygons inward.
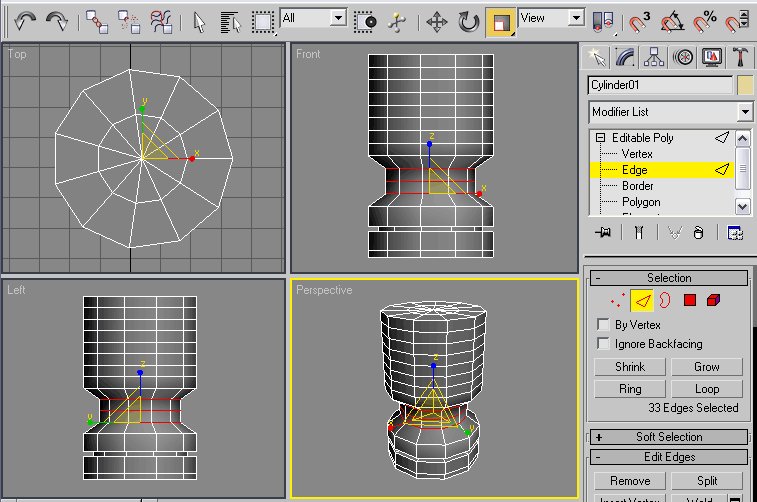
Step 6 Return to Edges sublevel and select the 6th, 7th, and the 8th row of edges from below (hold the CTRL key while you select one edge on the three rows and click the Loop button). Use Uniform Scale to scale the rows down. To make sure you scale them down equally on all sides, scale them down on the Perspective or the Top viewport.
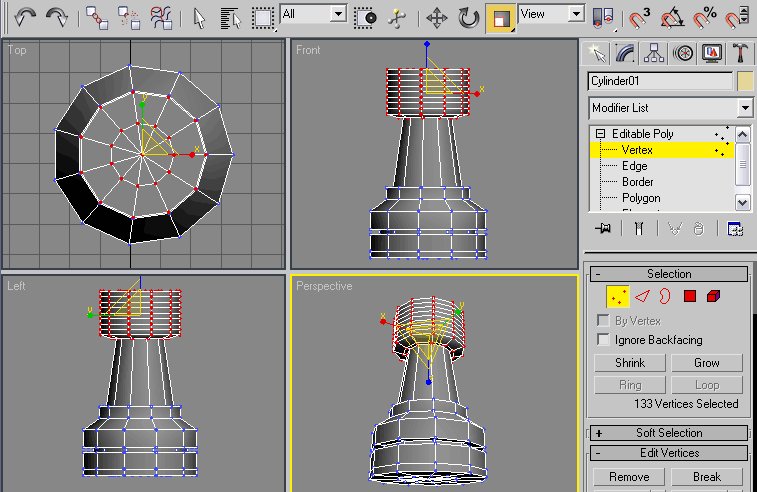
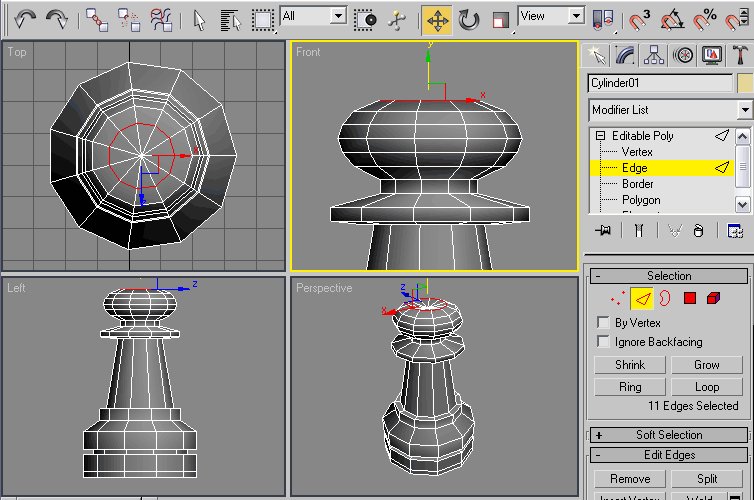
Step 7 Go to Vertex sublevel and select all the vertexes on the 9 rows from above, on the Front viewport. The easiest way to select those is to draw a selection rectangle around all those vertexes to select them all at once. Now scale them down on the Y-axis on the Front viewport, and move them up to get the results as shown in the screenshot.

Step 8 Go to Polygon sublevel again and select the 10th row of polygons from above. Click the square button next to the Extrude button, select Local Normal, and set Extrusion Height to -3.5 (minus 3.5). Click OK to extrude the polygons inward.

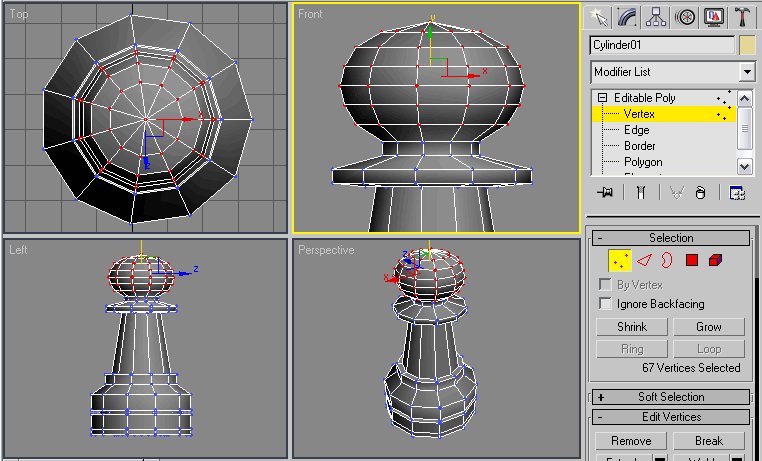
Step 9 Return to Vertex sublevel and select all the vertexes just above the polygons we just extrude and move them up until they almost reach the row above it. Use Uniform Scale to scale the row down. To make sure you scale them down equally on all sides, scale them down on the Perspective or the Top viewport.
Step 10 Select all the vertexes on the top half of the model and scale them down (Uniform Scale). To make sure you scale them down equally on all sides, scale them down on the Perspective or the Top viewport.
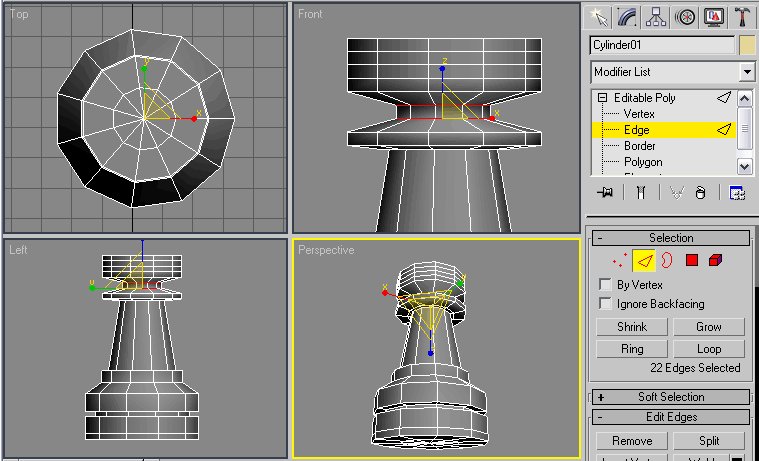
Step 11 Now zoom in on the Front viewport to get a closer view of the top half of the pawn. Go to Edges sublevel and select the 6th and 7th row from above (select one edge on both rows while holding the CTRL key, and click the Loop button). Scale down the two rows as shown in the screenshot.
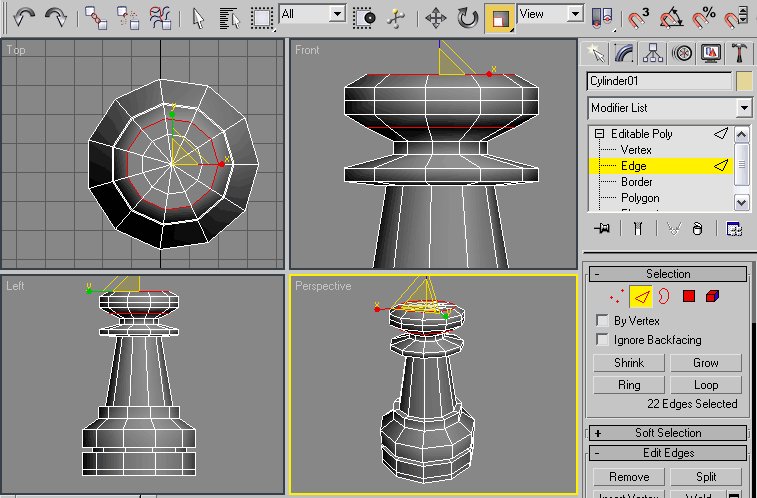
Step 12 Select the top row of edges and the row of edges 4 rows below it. Use Uniform Scale to scale the rows down.
Step 13 Select the 2th row of edges from above and the row of edges 2 rows below it. Use Uniform Scale to scale the rows down, but less than what you did in Step 12.
Step 14 Now select the row of edges between the previously selected rows and scale it down, again a little less than in the previous step.
Step 15 Now select the loop of edges on top of the pawn, on the Top viewport, and move them up on the Front viewport. (To select those edges, selecting one edge, and use the Loop button again to select that entire loop of edges).
Step 16 Go to Vertex sublevel and select the center vertex on top of the pawn and move it up. It may be a bit hard to select (or even see) the vertex, one way is to zoom in on the Top viewport and draw a selection rectangle, as small as possible, around the center vertex, and then de-select the vertex at the bottom of the pawn.

Step 17 As you can see in the screenshots in step 16, our ‘ball’ is a bit flat, so we need to adjust that. On the Front viewport, select all the vertexes that enclose the top 6 rows of polygons. Scale up on the Y-axis, and move the selected vertexes up until the ball becomes round. It doesn’t need to be perfect yet, you can tweak it a little after the next step if needed.
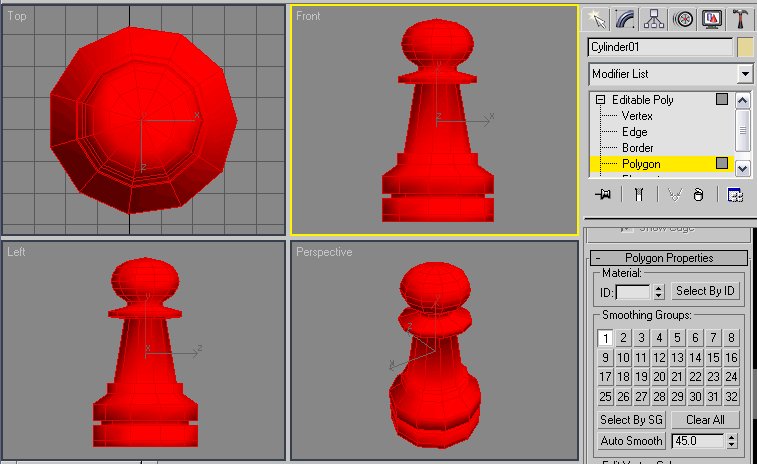
Step 18 Now let’s make it a bit smoother, hence more realistic. Go to Polygon sublevel and press CTRL-A to select all polygons of the model. Scroll down on lower part of the Modify tab until you see Smoothing Groups: (far below the Loop and Extrude buttons). While all the polygons are still selected, assign them all to smoothing group 1 by clicking on the 1 button (or the blank square button where 1 would be). Again, click the image on the right for more details.
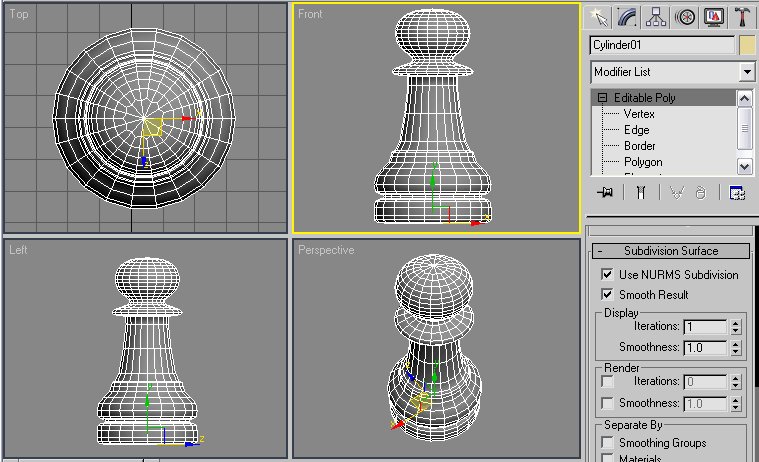
Step 19 Now for our final step before rendering. Leave the Polygon sublevel so the entire Editable Poly is selected. Scroll down on lower part of the Modify tab again until you see Subdivision Surface. Enable Use NURMS Subdivision, and set the Iterations to 1. A subdivision of 1 is usually enough, but if you are going to render a large close-up of the pawn, a Iterations value of 2 would be more appropriate (but requires more computer resources as well).
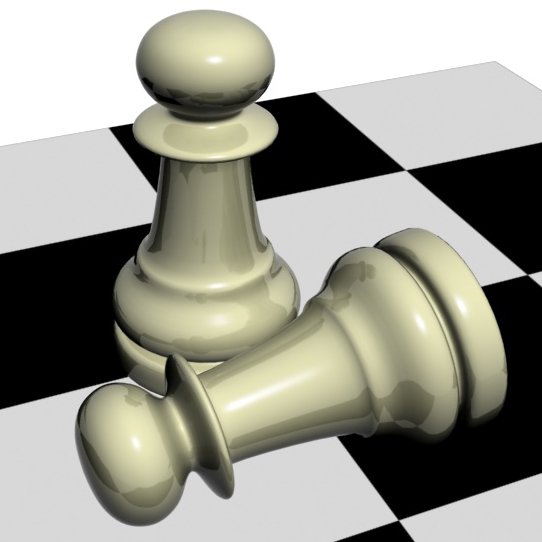
Step 20 Press F9 for a quick render to see the finished result. After adding some ivory like material (i.e. a Phong material with Specular Level 125, Glossiness 50, and a Fall-off/Fresnel map in the Reflection slot) your render should look something like the image on the right. (Click the thumb for a larger version.)Check out my Creating a realistic glass object tutorial to turn this pawn into a glass pawn.
I hope you enjoyed this tutorial and that it contributed something to your skills and knowledge!